
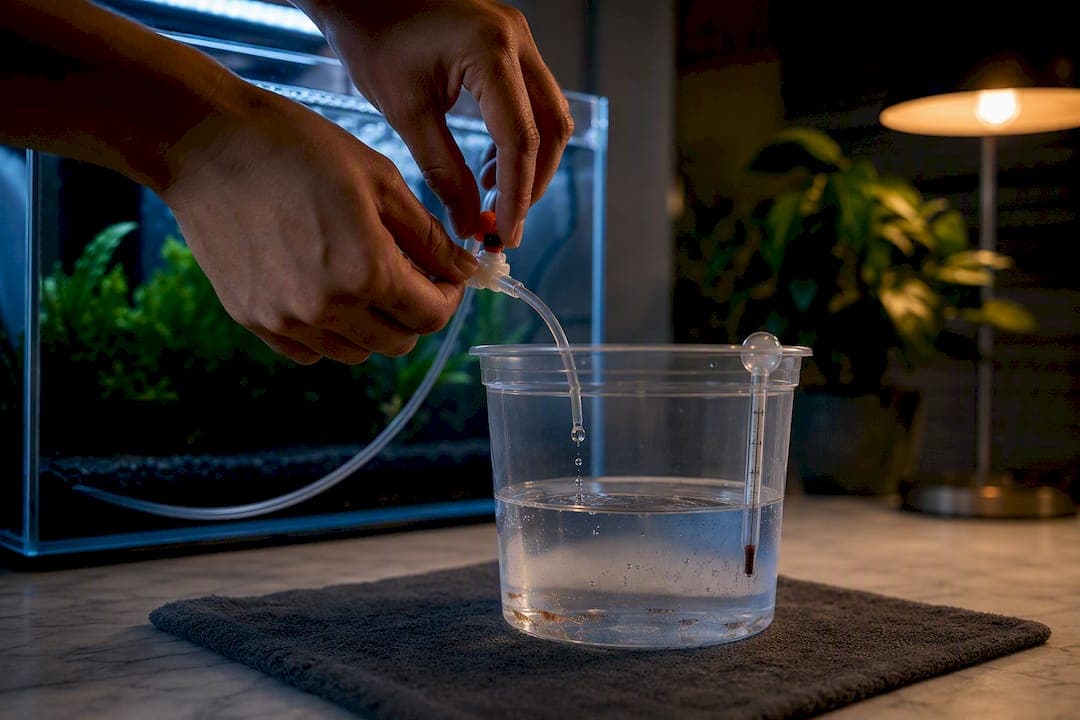
Start a slow siphon and let tank water drip into the shipping bag or acclimation container at about 1 to 2 drops per second until the volume has roughly doubled, which brings the mix close to half tank water and half shipping water. This typically takes a moderate amount of time over an hour. Net-transfer the animals into the tank, then dump the leftover water down the drain, not into your display. Live brine shrimp suppliers often include this exact protocol in their care guidance for hobbyists.
TL;DR:
- Drip acclimation should take 1 to 2 hours to achieve a 50/50 mix of shipping and tank water, sometimes longer for delicate shrimp species.
- Use a drip rate of about 1 to 2 drops per second, controlled with a flow valve or a loose knot, to prevent stress or oxygen depletion.
- Always discard shipping water after transfer to avoid concentrated ammonia, toxins, or medication residues entering the display tank.
- Sensitive species like freshwater shrimp require slower drip rates and periodic pauses to minimize osmotic shock and pH fluctuations.
- Rinsing brine shrimp in a mesh sieve is often preferred over drip acclimation due to salinity differences, especially when feeding freshwater tanks.
Table of Contents
- Why Drip Acclimation Matters for Shrimp and Other Sensitive Livestock
- What You Need Before You Open the Bag
- Step-by-Step Drip Acclimation Protocol
- Adjusting the Method for Shrimp, Brine Shrimp, and Copepods
- Troubleshooting Common Drip Acclimation Problems
- Demeter Notes on Nutrition and Reliable Live-Food Supply
- Order Live Brine Shrimp Built for a Smooth Acclimation
- Sources
- FAQ
Why Drip Acclimation Matters for Shrimp and Other Sensitive Livestock
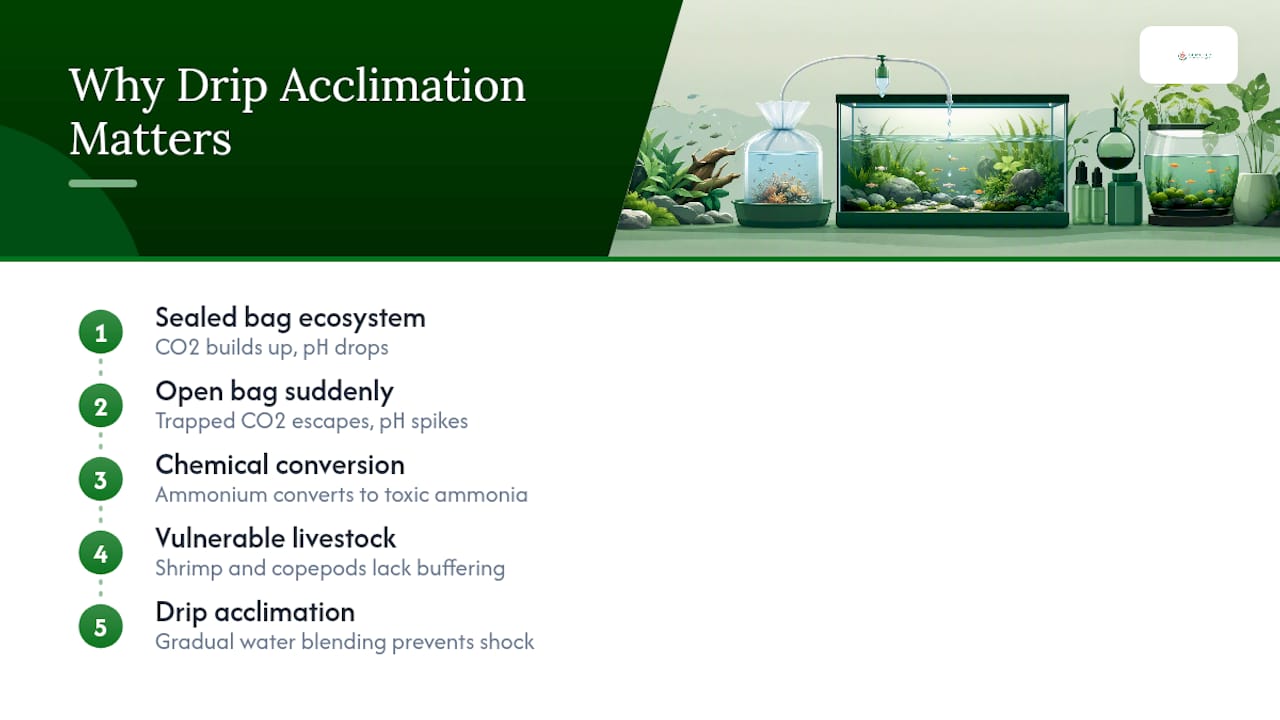
A sealed shipping bag is its own little ecosystem, and not a friendly one. CO2 builds up, pH drops, and once you crack the bag open and that trapped CO2 escapes, pH can spike fast, converting relatively harmless ammonium into toxic ammonia almost instantly. That chemistry shift is exactly why drip acclimation gradually blends aquarium water into shipping water instead of just dumping the bag into the tank.
Shrimp, copepods, and other invertebrates are especially vulnerable here. They lack the buffering capacity that many fish have, so a sudden jump in pH or hardness can trigger osmotic shock, molting failure, or death within hours. Shipping water almost always differs from your tank water in temperature, mineral content, and dissolved gases. Slowing that transition down gives gills and cell membranes time to adjust rather than getting hit all at once.
What You Need Before You Open the Bag
Get everything set up before you break the seal. Once animals are exposed to air or a stalled acclimation, delays cost you survival rate.
- A clean bucket or acclimation container at least twice the volume of your shipping bag
- About 3 feet of airline tubing to run from the tank to the container
- A fish net sized appropriately for the livestock
- An optional flow-control valve or a simple knot in the tubing
- A water conditioner or ammonia detoxifier on hand in case of dead arrivals
Position the container below the aquarium's waterline so gravity does the work of the siphon. Rinse any bucket or container that previously held soap, chemicals, or unrelated tank products. If you don't have a valve, a loose overhand knot in the airline tubing works fine to slow the flow. Short tubing is a common mistake. Three feet gives you enough drop for a steady drip without babysitting it constantly.
Step-by-Step Drip Acclimation Protocol
1. Dim the lights and pour gently. Sudden bright light stresses animals that just spent hours in a dark box. Open the bag and pour its contents, water and all, into your prepared container. If the water looks cloudy or smells off, a brief minute of extra aeration with an air stone helps before you start the drip.
2. Start the siphon and set your rate. Run airline tubing from the display tank into the acclimation container and get a siphon going. Aim for 1 to 2 drops per second. That is slow enough to prevent shock but fast enough that you're not standing there for half a day. Control the flow with a valve, a plastic clamp, or a simple knot tied into the tubing. Too fast and you undo the entire point of the exercise; too slow and oxygen in the container can drop before you finish.
3. Watch the volume, not the clock. Let the drip run until the container volume has roughly doubled, landing you close to a 50/50 mix of shipping water and tank water. For most fish and moderately hardy shrimp, that takes 1 to 2 hours. For genuinely delicate species, particularly Caridina shrimp that are picky about hardness and pH, some hobbyists push the dilution further toward 75% tank water before making the transfer, accepting a longer process in exchange for less stress.
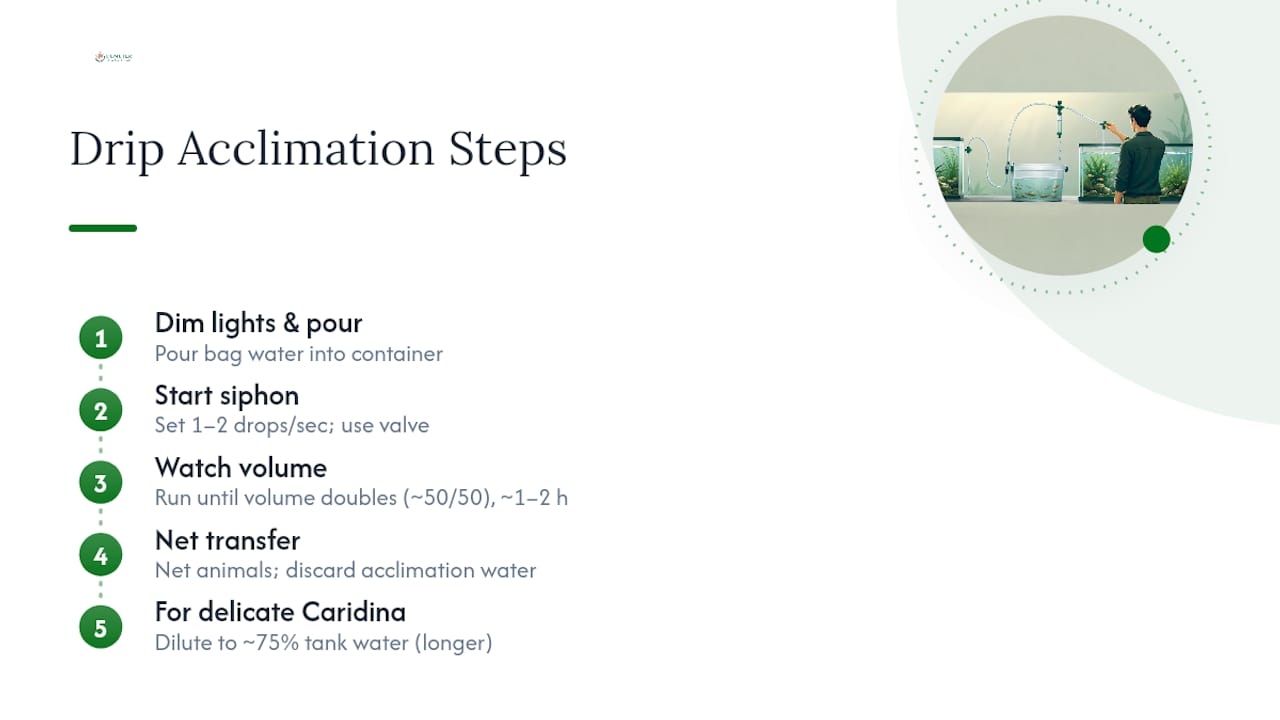
4. Net-transfer only, and toss the water. Once you've hit your target dilution, scoop the animals out with a net and place them directly into the tank. Never pour the acclimation water itself into your display. It carries concentrated waste, potential medication residue, and whatever ammonia built up during shipping. Pour it down a drain instead.
If you spot dead animals in the shipping bag when you first open it, treat the water in your container as compromised. Adding an ammonia detoxifier at that point is a reasonable precaution, and it's worth pausing the drip briefly to add a touch of extra aeration.
Pro Tip: Keep an airline control valve on hand permanently. A $3 valve gives you far more precise control than a knot, and it means you can slow a drip to a near stop in seconds if something looks wrong.
Commercial acclimation kits sold for this exact purpose typically bundle a glass U-tube, tubing, and a built-in flow-control valve, which is worth considering if you acclimate livestock often enough that fiddling with a knot gets old.
Adjusting the Method for Shrimp, Brine Shrimp, and Copepods
The core drip method holds steady across species, but a few groups need tweaks worth knowing before you start.
- Freshwater shrimp: These are the most sensitive of the bunch when it comes to pH and hardness. Slow your drip rate further and add pause points every 20 to 30 minutes to let the animals settle before continuing.
- Brine shrimp: Salinity is the main variable here, not pH. If you're transferring brine shrimp into a freshwater system as feed, rinse them first in a fine mesh sieve to strip away the saltwater rather than drip acclimating them at all. Adult brine shrimp tolerate a fairly wide temperature range, roughly 60°F to 82°F, but holding them at 68°F to 74°F keeps them calmer and more nutritionally intact before feeding.
- Copepods and other plankton: Skip aggressive aeration during acclimation. These animals are small enough that strong bubbles or turbulence do more harm than the water chemistry shift itself. Gentle, incremental additions of tank water work better than a full siphon setup.
- Holding before acclimation: If you can't acclimate immediately, keep live foods cool and gently aerated rather than warm and still. Demeter's guidance on storing live brine shrimp for 48 to 72 hours covers this in more detail.
Troubleshooting Common Drip Acclimation Problems
Most drip acclimation failures come down to one of a handful of predictable issues.
- Animals look stressed mid-drip. Pause the siphon, check the container's temperature and pH against the tank, and resume at a slower rate or with longer pauses between additions.
- The siphon won't hold steady. Reposition the container lower relative to the tank, inspect the tubing for kinks, and add a control valve if you're relying on a knot that's slipping.
- You find dead-on-arrival animals. Remove them immediately, treat the remaining water with an ammonia detoxifier, and reach out to your supplier. Demeter's own first-half-hour triage guide walks through exactly what to check and when it's worth a replacement request.
- You're tempted to just pour the water in. Don't. Shipping water can carry concentrated ammonia and residual medication, and pouring it into your display undoes everything the drip process was meant to prevent.
Demeter Notes on Nutrition and Reliable Live-Food Supply
A good acclimation protocol only gets you so far if the animal was nutritionally hollow before it ever hit the bag. Wild-harvested brine shrimp go through boom and starvation cycles that leave them thin on protein right when your fish need them most. Some farmed brine shrimp are raised on Dunaliella microalgae in controlled, land-based systems specifically to avoid nutritional variability, aiming for consistent protein content that survives shipping and acclimation intact.
If you notice repeated dead-on-arrival issues, that's worth a direct conversation with whoever supplies your stock, and it's part of why predictable shipping through a subscription tends to reduce the guesswork. For readers who want to go deeper on feeding routines, Demeter's guide on transitioning fish to live food is worth a look.
— Demeter
Order Live Brine Shrimp Built for a Smooth Acclimation
Aquarium hobbyists often seek live brine shrimp that arrive nutritionally intact instead of already stressed and starved from a wild harvest. Every batch is raised on Dunaliella microalgae in a controlled, land-based system, targeting at least 40% protein content instead of the seasonal variability you get from wild-caught stock.
That consistency matters most right when you're running the drip protocol above. An animal that arrives well-fed tolerates the acclimation window better than one that's already running on empty. You can order live brine shrimp directly for a one-time shipment, or set up the monthly membership at $25 per month if you feed regularly and want to stop worrying about timing your next order. Local fish stores and institutions looking at larger volumes can check the bulk order page for options. Place an order today and put fresher, better-fed live food into your next acclimation cycle.
Sources
For deeper detail on the mechanics covered here, the Glass Grown Aquatics drip acclimation guide and the Seahorse.com brine shrimp care sheet both go into more depth on species tolerances. Demeter's own blog covers the handling side, including unpacking shipments without losing nutrition and rinsing brine shrimp before feeding.
- How to Drip Acclimate Shrimp and Fish – Glass Grown Aquatics
- Acclimation Drip Kit — Aquatic Live Food (product and how-to summary)
- Seahorse
FAQ
How Long Should Drip Acclimation Take?
Most drip acclimation runs 1 to 2 hours to reach a roughly 50/50 mix of shipping and tank water; sensitive shrimp species sometimes need longer stretches toward a 75% dilution.
What Drip Rate Should I Use?
Aim for about 1 to 2 drops per second, adjustable with a control valve or a simple knot in the airline tubing.
Can I Pour the Acclimation Water Into My Tank?
No. Acclimation water can hold concentrated ammonia and residual medication from shipping, so it should always go down the drain, not into the display.
Does Drip Acclimation Work for Brine Shrimp Too?
Yes, though many hobbyists rinse brine shrimp in a mesh sieve instead when moving them straight into a freshwater feeding setup, since salinity rather than pH is the main concern.
Where Can I Buy Live Brine Shrimp Raised for Consistent Nutrition?
Demeter Biosciences sells live brine shrimp direct-to-consumer, along with a monthly membership option for hobbyists who feed on a regular schedule.