
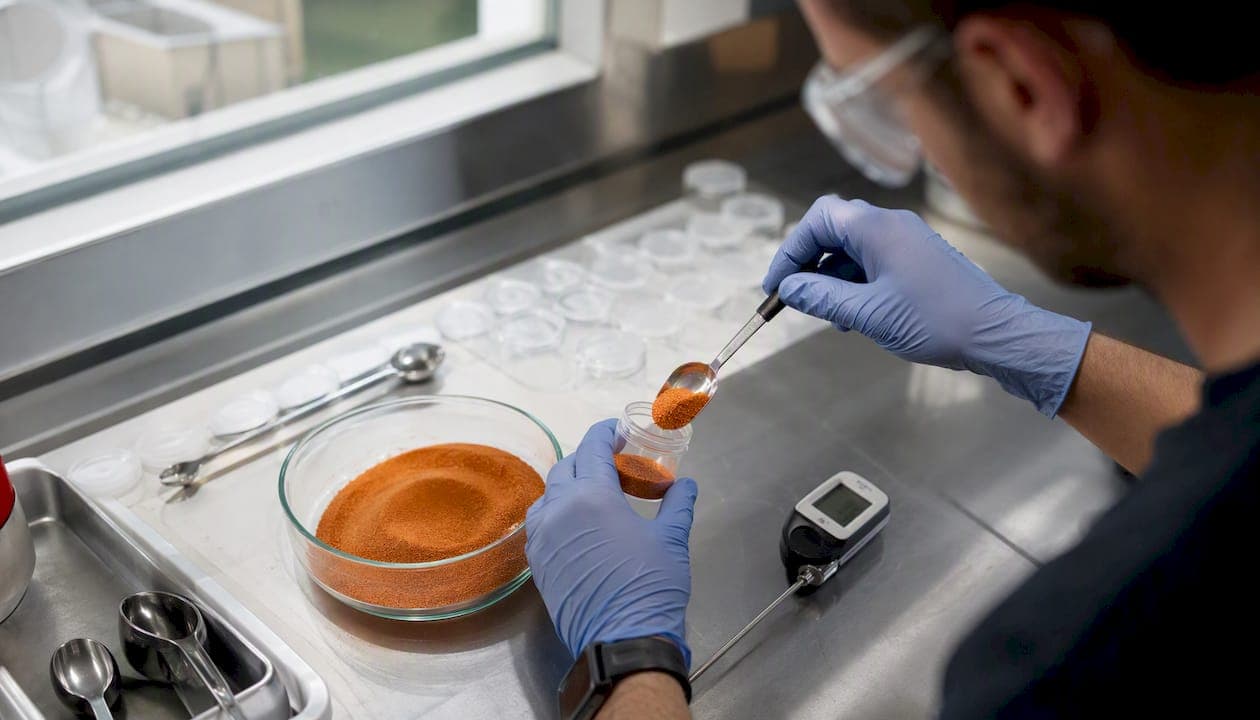
Bulk brine shrimp handling comes down to five moves: decapsulate and brine your eggs when you want shell-free synchrony, run an aerated hatchery at the right setpoints, harvest during the peak window, then concentrate, rinse, and either cold-store the nauplii or feed them out immediately. Hit the right water chemistry and you can expect 80 to 90 percent hatch rates in 18 to 24 hours.
The setpoints that matter most:
- Temperature: 26 to 28°C
- Salinity: 20 to 25 ppt for hatching
- pH: 8.0 to 8.5
- Hatch window: 18 to 24 hours at 80 to 90% under good conditions
Quick operational note: decapsulated eggs stored in 300 ppt brine at approximately 4°C hold for up to a week, so you can prep seven days of aliquots in one session. Refrigerated live nauplii keep most of their nutritional value for 24 to 48 hours, which gives you a buffer between hatches and feedings.
Key Takeaways
Bulk brine shrimp handling succeeds when operators hit precise temperature, salinity, and pH targets while using brining and refrigeration to decouple daily feeding from daily hatching labor.
| Point | Details |
|---|---|
| Hit the parameter window | Keep temperature at 26 to 28°C, salinity at 20 to 25 ppt, and pH at 8.0 to 8.5 for 80 to 90% hatch rates in 18 to 24 hours. |
| Decapsulate for a week at once | Brine decapsulated eggs at 300 ppt and refrigerate at 4°C to pull seven daily aliquots from one session. |
| Rinse before feeding | Concentrate nauplii through 100 to 150 micron mesh to strip salt and shells before they reach the tank. |
| Diagnose before discarding | Metal toxicity, not bad eggs, causes most no-hatch failures. A chelating conditioner fixes it. |
| Buy bulk when labor outweighs cost | Demeterbioscience's microalgae-fed live brine shrimp offers a consistent high protein supply for operators who'd rather skip the hatchery labor. |
Table of Contents
- Setting Up a Hatchery for Bulk Brine Shrimp Handling
- Bulk Decapsulation and Brining for Consistent Hatches
- How Do You Harvest and Concentrate Nauplii in Bulk?
- Storing Brined Eggs and Cold-Held Nauplii
- Troubleshooting Failed or Underperforming Batches
- Enrichment and Feeding Rates for Nauplii
- A One-Week Aliquot Protocol You Can Copy
- Should You Hatch In-House or Order Bulk Live Shrimp?
- Frequently Asked Questions
- Sources
Setting Up a Hatchery for Bulk Brine Shrimp Handling
Vessel shape decides whether your bulk hatching is repeatable or a daily gamble. A cone or inverted-bottle vessel with a V-bottom keeps cysts suspended evenly and lets you drain nauplii through a bottom valve without disturbing the water column. Flat-bottom containers and shallow dishes work fine for small classroom batches with 3 to 4 inches of water, but at production volume they create dead zones where cysts settle, mold, and rot instead of hatching.
Here's the basic setup sequence for a cone-based hatchery:
- Fill the cone with saltwater mixed to 20 to 25 ppt using marine salt or non-iodized solar salt, never iodized table salt.
- Position an air stone directly at the bottom point of the cone so bubbles lift cysts through the entire water column.
- Add a heater set to hold 26 to 28°C, since temperature swings below that range stretch hatch time out to 36 hours or longer.
- Set continuous overhead lighting. Artemia nauplii cue their swimming and feeding behavior off light, and constant illumination keeps hatch rates consistent.
- Stock cysts at roughly 1 to 2 grams per liter. Overloading past that density starves the batch of dissolved oxygen and drags hatch rates down even with strong aeration.
For daily or weekly supply, stagger your hatches. Starting a fresh cone every 24 to 48 hours smooths out your yield instead of leaving you with a single 24-hour glut followed by nothing. Some low-tech operators run dish-based staggered batches on a rotating schedule specifically to avoid this feast-or-famine cycle.
Equipment checklist for a bulk setup:
- Conical hatching vessel (2 to 5 gallon capacity for small operations, larger for institutional scale)
- Air pump rated for continuous duty, plus a weighted air stone
- Submersible heater with a reliable thermostat
- Continuous light source (a simple aquarium bulb works)
- Refractometer or hydrometer for checking salinity
- pH test kit
Pro Tip: Mark your cone with a waterline at your target volume before you start seeding. It sounds trivial, but consistent volume is what makes your grams-per-liter density calculations repeatable batch after batch.
Bulk Decapsulation and Brining for Consistent Hatches
Decapsulating cysts before you hatch them strips the hard outer shell, which does two things: it synchronizes hatching because every embryo starts from the same exposed state, and it eliminates empty shell fragments that would otherwise end up in your harvest or, worse, get eaten by larval fish that can't digest chitin. Decapsulated embryos can also be fed directly to larger fry without hatching them at all.
The stepwise decapsulation process, at a working level:
- Hydrate raw cysts in freshwater for 1 hour to soften the shell before treatment.
- Prepare a chlorine or bleach solution at a standard commercial ratio and submerge the hydrated cysts, stirring continuously.
- Watch for the color shift from brown to orange to gray. That shift means the shell has dissolved and it's time to stop.
- Neutralize immediately with a sodium thiosulfate rinse, then flush thoroughly with freshwater until no chlorine smell remains.
- Concentrate the neutralized embryos through a fine mesh before moving to brine.
Once decapsulated, store the eggs in a 300 g/L brine solution and refrigerate at approximately 4°C. That combination holds embryos viable for up to a week, letting you decapsulate one batch and pull daily aliquots rather than repeating the whole chemical process every morning. Incubation before storage typically runs 16 to 24 hours to fully arrest development at the right stage.
Safety matters here more than in almost any other step. Work in a ventilated area, wear gloves and eye protection, and never mix bleach with ammonia-based products nearby.
Pro Tip: Portion your decapsulated batch into labeled daily containers the moment you finish neutralizing, before refrigeration. Trying to divide a settled, week-old brine block evenly is far messier than splitting it fresh.
How Do You Harvest and Concentrate Nauplii in Bulk?
Harvesting hinges on phototaxis. Nauplii swim toward light; empty shells and unhatched cysts don't. Use that difference to separate your harvest cleanly.
- Turn off the air supply and let the cone sit undisturbed for 5 to 10 minutes.
- Shine a light at the bottom of the cone near the drain valve. Live nauplii cluster toward it within minutes, forming a visibly denser layer.
- Open the drain valve and siphon that dense layer into a collection vessel, stopping before shells and debris start coming through.
- Rinse the harvested nauplii through a 100 to 150 micron mesh net under a gentle freshwater or saltwater rinse to strip off residual brine and shell fragments.
Equipment worth having on hand: a length of airline tubing for siphoning, a valve-equipped cone (worth the upgrade if you're hatching weekly), a dedicated brine shrimp net in the 100 to 150 micron range, and a turkey baster or large pipette for smaller volume transfers.
A rough yield benchmark: a well-run 1 gallon hatch at 1.5 g/L stocking density typically concentrates down to 50 to 100 mL of dense live nauplii after the rinse step. If you're feeding freshwater fry or low-salinity systems, that rinse step isn't optional. Unrinsed nauplii carry enough residual salt to shift tank chemistry if you're dosing multiple times a day.
Storing Brined Eggs and Cold-Held Nauplii
Two storage tracks cover most bulk operations: brined decapsulated eggs waiting to be hatched, and already-hatched nauplii waiting to be fed. Each has different rules.
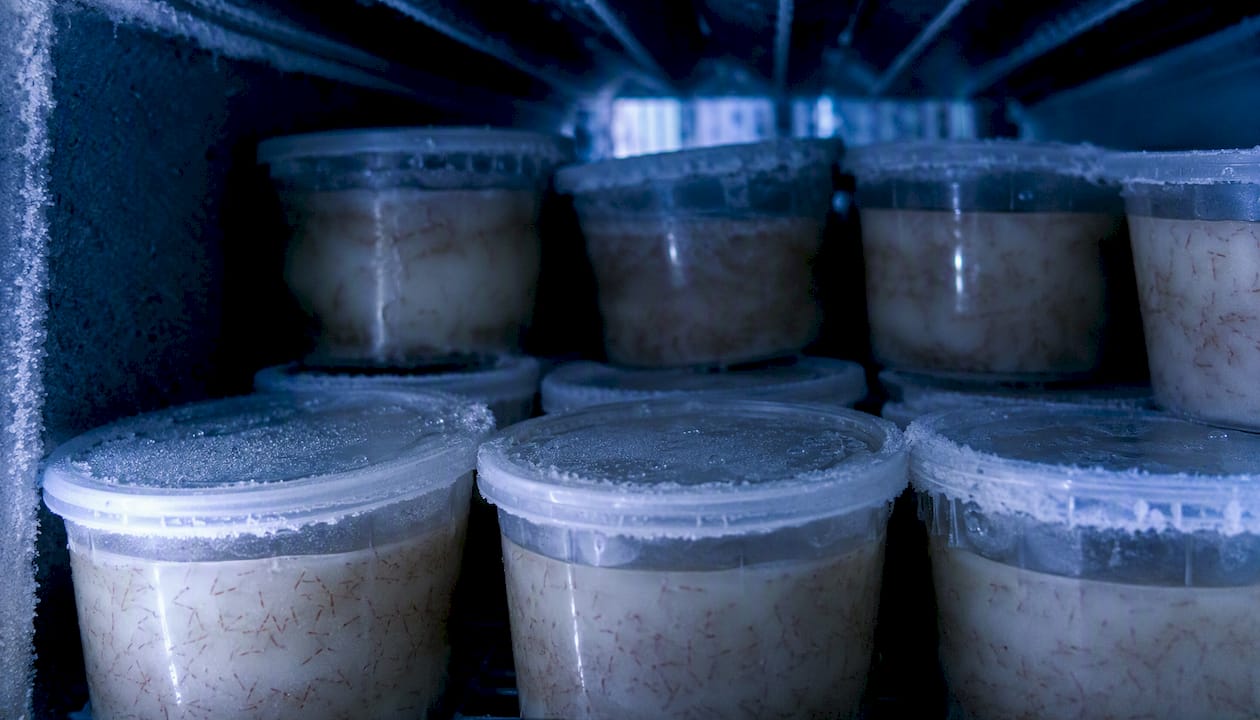
Decapsulated eggs in 300 ppt brine hold at 4°C for up to a week. Keep the container sealed to limit evaporation, and give it a gentle swirl before pulling each daily aliquot since embryos settle over time and an un-mixed container gives you an uneven dose. Live nauplii, once hatched and rinsed, keep for 24 to 48 hours refrigerated at around 4°C with only minor nutritional loss. That's a meaningful buffer against a lost workday or an unpredictable feeding schedule. Compare that against feeding live versus frozen brine shrimp: frozen and thawed nauplii lose significant lipids and structural integrity, which is exactly the trade-off cold storage avoids.
| Storage Method | Conditions | Shelf Life | Notes |
|---|---|---|---|
| Decapsulated eggs in brine | 300 ppt brine, ~4°C | Up to 1 week | Swirl before each aliquot pull |
| Live nauplii, refrigerated | ~4°C, high density | 24 to 48 hours | Minimal nutrient loss |
| Unopened cyst tins | Freezer | Multiple years | Best for long-term stock |
| Opened cyst tins | Refrigerated, sealed | A few months | Hatch rates commonly 80 to 90% if stored properly |
Don't leave opened tins at room temperature with loose lids. Moisture intrusion is the fastest way to kill viability on cysts you haven't even used yet.
Troubleshooting Failed or Underperforming Batches
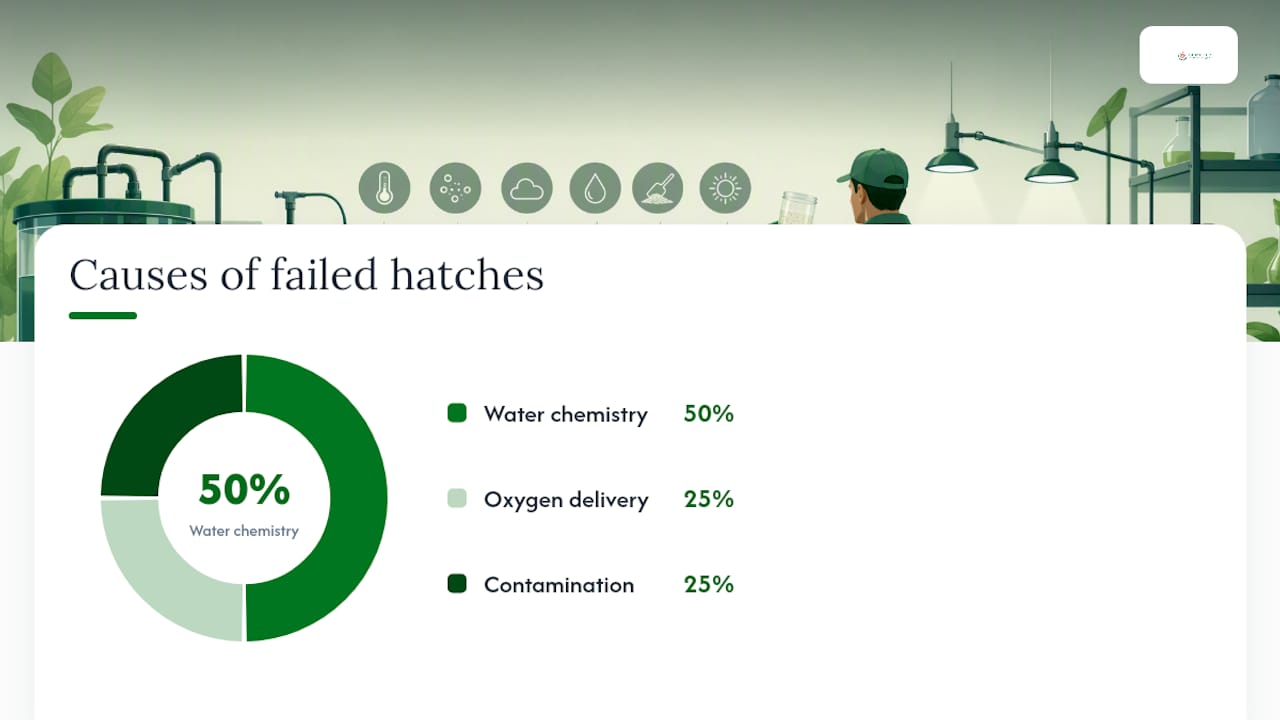
Most bulk hatching failures trace back to one of three things: water chemistry, oxygen delivery, or contamination. The fix usually depends on matching the symptom to the right cause instead of guessing.
| Symptom | Likely Cause | Immediate Fix |
|---|---|---|
| Eggs intact, no hatching after 24+ hours | Metal toxicity from tap water | Add a chelating water conditioner or switch to aged water |
| Nauplii die within hours of hatching | Oxygen shortfall from overstocking | Reduce cyst density, check air stone placement |
| Cloudy water, foul smell | Bacterial bloom | Discard batch, sanitize vessel before next run |
| Partial hatch, slow timeline | pH drift below 8.0 | Adjust with a small amount of baking soda |
Trace heavy metals like zinc and copper in tap water are a documented cause of stalled hatches, and it's an easy one to miss since the eggs look perfectly fine under a loupe. A chelating conditioner or a rest day with aged water resolves the majority of these cases without discarding your cyst stock.
Density collapse looks different: nauplii hatch, then die en masse within a few hours, often with visible cloudiness. That's usually oxygen debt from too many cysts competing for too little dissolved oxygen, compounded by weak aeration. Low-tech dish methods sidestep a lot of this simply by running smaller, better-oxygenated batches instead of one oversized cone.
Pro Tip: Before writing off an entire batch of cysts as bad stock, run a small trial hatch in a shot glass or test tube with fresh water and no additives. If that tiny batch hatches fine, the problem was your main vessel's water, not the eggs.
Enrichment and Feeding Rates for Nauplii
Freshly hatched nauplii still carry their yolk sac and offer solid baseline nutrition, but gut-loading them for 12 to 24 hours before feeding measurably boosts their lipid and DHA content. Once nauplii develop a functioning digestive tract, typically 8 hours after hatching, they can actively consume enrichment media.
Common enrichment agents include:
- Commercial emulsion products (Selco-type serums)
- Live phytoplankton suspensions, particularly Nannochloropsis
- Spirulina powder mixed into a thin suspension
- Harvest and rinse nauplii as usual.
- Suspend them in enrichment medium at the manufacturer's recommended dose for 12 to 24 hours under light aeration.
- Rinse thoroughly through mesh before feeding to strip excess enrichment media and prevent water quality issues in the display or rearing tank.
Feed freshly hatched nauplii to very young fry that need the smallest possible prey size, and reserve 24-hour gut-loaded nauplii for slightly larger larvae that benefit more from the boosted lipid profile. Watch for over-enrichment. Nauplii left too long in a dense enrichment slurry can pick up bacterial contamination, which defeats the purpose entirely. For detailed enrichment ratios by species, see this breakdown of brine shrimp nutrition for commercial larval fish.
A One-Week Aliquot Protocol You Can Copy
This is the exact math for turning one decapsulation session into seven days of feed.
Materials checklist: bleach/chlorine decapsulation solution, sodium thiosulfate neutralizer, fine mesh strainer, seven labeled 300 mL containers, non-iodized salt for brine, refrigerator space at 4°C.
Pro Tip: Work in a ventilated space with gloves and eye protection during decapsulation, and never store neutralized eggs in the same container you used for the bleach step, even after rinsing.
What Experienced Hatchery Operators Actually Prioritize
Operators who run hatches week after week stop chasing gadgets and start chasing consistency. They condition their water with a chelator every time, run two or three smaller vessels instead of one large one, and keep a fixed schedule rather than reacting to problems as they surface. Automate aeration and temperature, sure, but check for metal toxicity and bacterial blooms by eye and nose, not by sensor. Farmed, microalgae-fed cysts also remove one variable entirely: the seasonal nutritional swings that come with wild-harvested stock.
Should You Hatch In-House or Order Bulk Live Shrimp?
Running a hatchery well takes real setup labor, chemical handling, and a tolerance for the occasional lost batch. If your operation needs a predictable supply without the equipment investment or the troubleshooting curve, buying farmed live brine shrimp fed exclusively on Dunaliella microalgae skips the variability entirely.
If your setup involves multiple tanks, larval production runs, or a retail counter that needs consistent stock, the bulk order page is built for exactly that volume. As a rough threshold: once your labor hours on decapsulation and hatching start competing with actual fish care time, or once a single bad batch would cost you more than a month of purchased shrimp, outsourcing part or all of your supply usually pays for itself. Museums, research institutions, and local fish stores already run this way instead of maintaining their own hatchery lines. Reach out through the contact page for institutional pricing or subscription scheduling that matches your feeding cadence.
Frequently Asked Questions
What's the ideal salinity for bulk brine shrimp hatching? Aim for 20 to 25 ppt during hatching. Brining decapsulated eggs for storage uses a much higher concentration, 300 ppt, which is a preservation solution rather than a hatching environment.
How long can I store decapsulated brine shrimp eggs? Up to a week when kept in 300 ppt brine and refrigerated at approximately 4°C, which is long enough to supply daily aliquots from a single decapsulation session.
Why didn't my brine shrimp eggs hatch even though they look fine? Trace metals like zinc or copper in tap water are a frequent, invisible cause. Switching to aged water or adding a chelating conditioner resolves most of these cases.
Can I feed nauplii immediately after hatching, or should I enrich them first? Freshly hatched nauplii work fine for very small fry. Gut-loading them with a phytoplankton or emulsion enrichment for 12 to 24 hours boosts lipid and DHA content for larger larvae.
Is it better to hatch brine shrimp myself or buy live shrimp in bulk? It depends on your scale and labor tolerance. Operations feeding multiple tanks or running consistent production schedules often find that ordering farmed live brine shrimp in bulk costs less in labor and lost-batch risk than maintaining an in-house hatchery.
Sources
- FA176: Brine shrimp hatching parameters (IFAS)
- FAO: Live feed and brine shrimp handling (W3732E)
- PubMed: Heavy metal sensitivity in Artemia (study)