
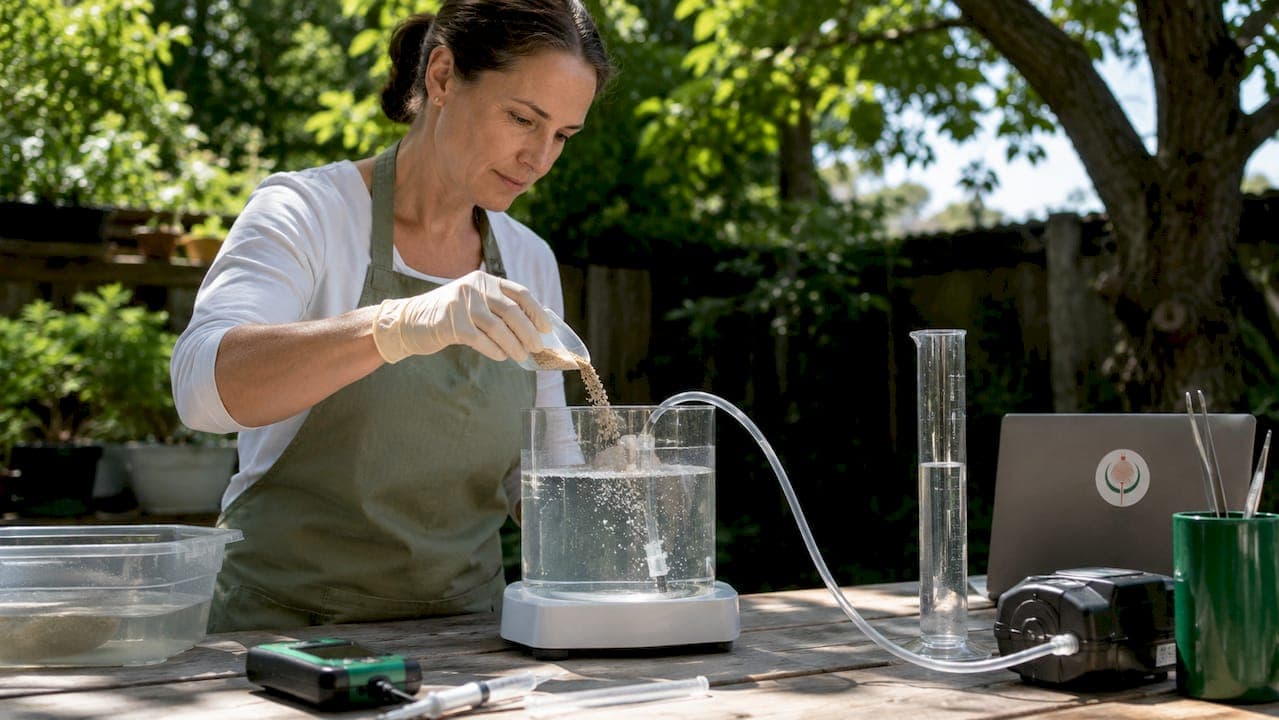
A brine shrimp feeding station is a dedicated setup for hatching, growing, and harvesting live brine shrimp (Artemia salina) as nutritious live feed for aquarium fish and fry. The industry term for this process is a brine shrimp hatchery system, though hobbyists commonly call it a feeding station or care station. Getting it right means controlling three variables: water parameters, aeration, and feeding timing. When you set up a brine shrimp feeding station correctly, you can achieve hatch rates of 80–90% within 18–24 hours. That kind of consistency is what separates hobbyists who always have live food ready from those who scramble every other day.
What do you need to set up a brine shrimp feeding station?
The right equipment makes or breaks your brine shrimp feeding setup before a single egg hits the water. You do not need expensive gear, but you do need the right gear.
Core equipment list
- Hatching vessel: A 1–2 liter clear plastic or glass bottle works well. Cone-shaped or inverted bottles improve egg suspension and nauplii collection.
- Air pump and airline tubing: Continuous aeration keeps eggs suspended and oxygenated. A basic single-outlet pump handles one or two bottles.
- Air stone: A fine-bubble air stone distributes oxygen more evenly than open tubing.
- Aquarium salt: Use non-iodized salt or a dedicated marine salt mix. Iodized table salt kills eggs.
- Brine shrimp eggs: Decapsulated eggs hatch faster and eliminate shell contamination in your tank.
- Mesh harvest net: A 100–150 micron net separates nauplii from unhatched eggs and shells.
- Thermometer: Temperature control is non-negotiable for consistent hatch rates.
- Light source: A small LED or desk lamp placed to one side of the vessel helps with phototaxis-based harvesting.
| Equipment | Function |
|---|---|
| Hatching vessel | Contains saltwater and eggs during incubation |
| Air pump and tubing | Maintains aeration and egg suspension |
| Aquarium salt | Creates correct salinity for hatching |
| Mesh harvest net | Separates live nauplii from shells and debris |
| Thermometer | Monitors water temperature for hatch success |
| LED light source | Concentrates shrimp for easy harvesting |
Pro Tip: Specialized hatchery dishes use light and baffle design to separate shrimp from shells without any air pump at all. If you want a lower-maintenance option, these dishes are worth the modest extra cost.
How do you prepare water conditions and start the hatchery?
Water chemistry is the single most important factor in your brine shrimp hatchery setup. Get this wrong and even premium eggs will fail.
Step-by-step water and hatchery preparation
-
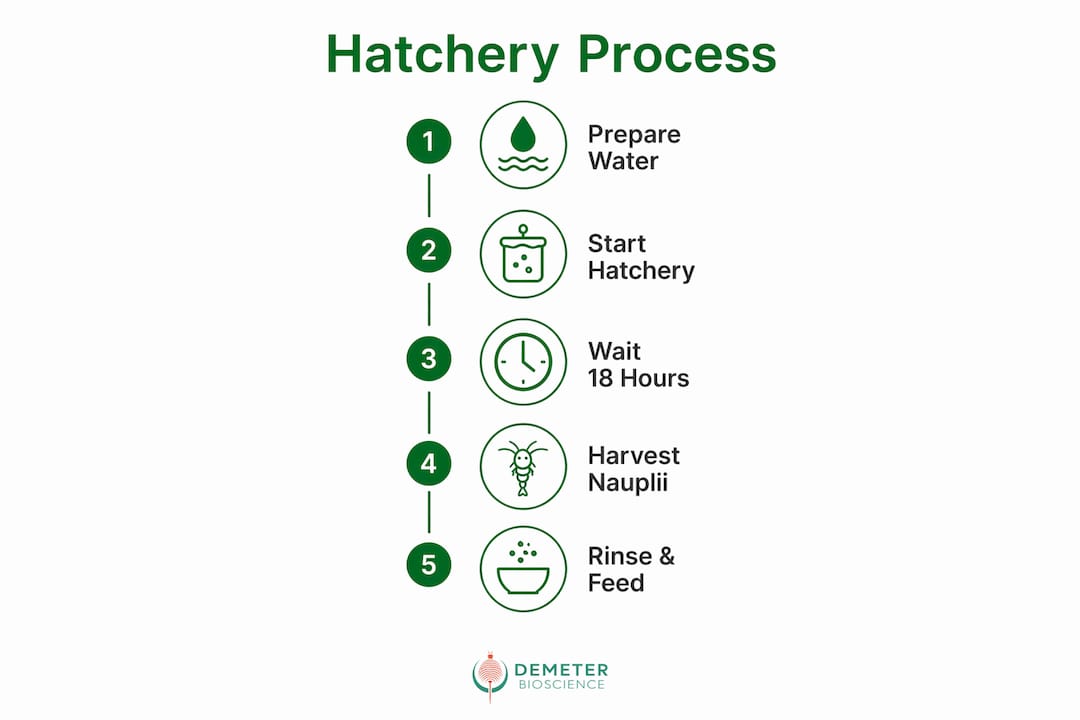
Mix your saltwater. Dissolve non-iodized aquarium salt in dechlorinated tap water or RO water to reach a salinity of 20–25 ppt. Use a refractometer for accuracy. A hydrometer works but is less precise.
-
Set your temperature. Place your hatching vessel in a warm location or use a small submersible heater. The optimal range is 26–28°C. Temperatures below 24°C slow hatching significantly. Temperatures above 30°C stress the nauplii.
-
Add eggs at the correct density. Overcrowding is one of the most common beginner errors. Excessive egg density causes eggs to clump and settle, cutting off oxygen to the lower layers. Aim for roughly 0.5–1 teaspoon of eggs per liter of water.
-
Start aeration immediately. Connect your air pump and air stone before adding eggs. The water should show a steady stream of fine bubbles that keeps all eggs visibly moving. No eggs should sit on the bottom.
-
Position your light source. Place a lamp to one side of the vessel, not directly above it. Brine shrimp are positively phototactic, meaning they swim toward light. Positioning the light to one side concentrates them for easier harvesting later.
-
Wait 18–24 hours. At the correct temperature and salinity, nauplii hatch within this window. Harvesting at the 18–20 hour mark captures shrimp at peak yolk sac nutrition, which is the highest nutritional value they will ever have.
Pro Tip: Set a phone alarm for the 18-hour mark. Nauplii that remain in the hatching vessel past 24 hours start consuming their own yolk sac reserves, reducing the nutritional benefit to your fish.
How do you harvest, rinse, and feed brine shrimp to your fish?
Harvesting correctly protects your aquarium from salt contamination and ammonia spikes. The process takes under five minutes once you have practiced it twice.
Harvesting nauplii from the vessel
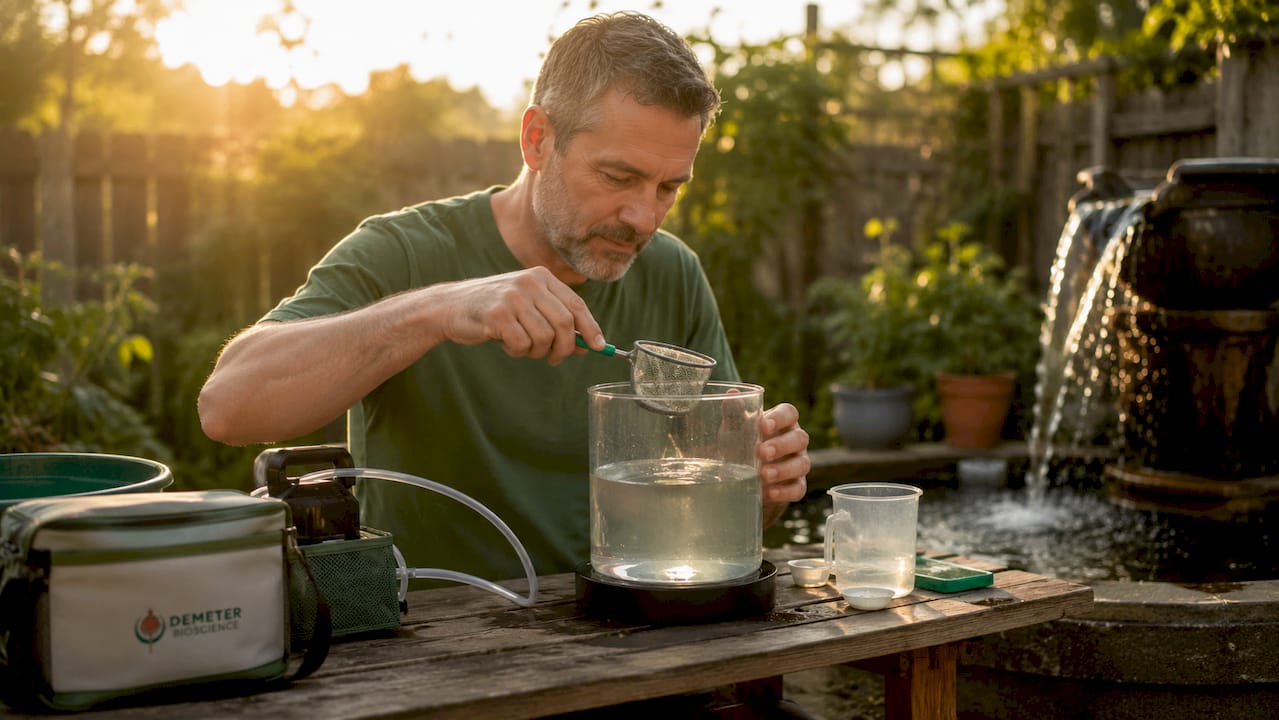
Turn off the air pump and let the vessel sit undisturbed for 5–10 minutes. Unhatched eggs and empty shells float to the surface or sink to the bottom. Live nauplii concentrate in the middle of the water column, especially near your light source. Use a turkey baster or small siphon to draw the nauplii from the middle layer and pour them through your mesh net.
Rinsing before feeding
Salt water from a hatchery vessel does not belong in a freshwater aquarium. Rinse nauplii through a 100–150 micron mesh net for 10–15 seconds under fresh, dechlorinated water. This removes residual salt, metabolic waste, and any shell fragments. For marine tanks, rinsing is still good practice to remove waste buildup from the hatchery water.
Feeding portion control
- Feed only what your fish can consume in 3–5 minutes. Uneaten shrimp die in the tank and decompose, causing ammonia spikes.
- For fry, use a pipette or small dropper to target feed directly near the fish. Fry cannot chase food across a large tank.
- For adult fish, release nauplii near the surface or mid-column where your fish naturally feed.
- Use light to position shrimp in the feeding zone before releasing them. Shine a small flashlight at the area of the tank where your fish feed most actively.
Gut-loading for extra nutrition
Newly hatched nauplii are already nutrient-rich, but you can push their value further. Transfer them into clean saltwater enriched with a supplement like Selco or a similar HUFA-based enrichment product for 12–24 hours before feeding. This gut-loading step is especially valuable when raising sensitive marine larvae or breeding fish. For a deeper look at what makes brine shrimp nutritionally valuable, the brine shrimp nutritional breakdown from Demeterbioscience covers the key compounds in detail.
Pro Tip: Never dump an entire hatchery batch into your tank at once. Start with a small test portion, watch how quickly your fish consume it, and adjust the next feeding accordingly.
How do you maintain your station and fix common problems?
A brine shrimp care station only stays productive with a consistent cleaning and scheduling routine. Most failures come from neglect, not bad technique.
Cleaning and batch management
Rinse your hatching vessel with hot water after every batch. Do not use soap or bleach unless you rinse thoroughly afterward, as residue kills eggs. Rotate between two vessels so one is always clean and ready. This also lets you run staggered hatch cycles, which is the single biggest improvement most hobbyists can make.
Running two smaller staggered hatches instead of one large batch produces a steadier supply of nauplii, reduces waste, and keeps water quality higher in both vessels. Most beginners fail by producing a massive oversupply, then struggling with dead shrimp and fouled water.
Recognizing and fixing common problems
- Low hatch rate: Check temperature first. A drop below 24°C is the most common cause. Check salinity second. Salinity outside the 20–25 ppt range reduces hatch success sharply.
- Eggs clumping at the bottom: Increase aeration. Clumping means eggs are not staying suspended, which cuts oxygen to the lower layers.
- Cloudy or foul-smelling water: The vessel needs cleaning. Bacterial growth from leftover organic matter contaminates new batches.
- Shrimp dying before harvest: The vessel may be too warm, or egg density is too high. Reduce eggs per liter and check your thermometer.
- Shells in the tank: You are either skipping the rinsing step or your mesh net has a tear. Inspect the net before every harvest.
For a structured approach to scheduling your hatches and feedings, the 2026 feeding schedule checklist from Demeterbioscience lays out a practical weekly routine.
Key Takeaways
A successful brine shrimp feeding station requires precise water conditions, consistent aeration, staggered hatch cycles, and proper rinsing before every feeding.
| Point | Details |
|---|---|
| Water parameters matter most | Maintain 20–25 ppt salinity and 26–28°C temperature for 80–90% hatch rates. |
| Stagger your hatches | Run two smaller batches on offset schedules to avoid oversupply and waste. |
| Always rinse before feeding | Use a 100–150 micron net and 10–15 seconds of fresh water to remove salt and waste. |
| Control feeding portions | Feed only what fish consume in 3–5 minutes to prevent ammonia spikes. |
| Gut-load for better nutrition | Enrich nauplii in HUFA-based supplements for 12–24 hours before feeding sensitive species. |
What I have learned from running brine shrimp hatches consistently
Most hobbyists treat their brine shrimp hatchery as a set-and-forget system. That is the wrong approach. The biggest gains come from treating each hatch cycle as a timed event, not a background task.
Timing your harvest to the 18–20 hour window is not just a best practice. It is the difference between feeding your fish a nutrient-dense live food and feeding them an empty shell with legs. The yolk sac depletes fast once nauplii hatch. Every hour past that window is nutritional value your fish will never get.
The staggered hatch method changed how I think about the whole station. Running two vessels on a 12-hour offset means I always have fresh nauplii ready without the chaos of a single large batch going bad. It also keeps each vessel smaller and easier to clean.
One thing I rarely see discussed: light placement during feeding matters as much as light placement during harvesting. Brine shrimp swim toward light. If you position a small flashlight at the surface near your fish before releasing nauplii, the shrimp concentrate exactly where your fish are already looking. The feeding efficiency improvement is immediate and visible.
Start with one vessel, one batch, and one species. Scale only after you have two or three consistent hatches under your belt. The role of brine shrimp in larval fish rearing becomes much clearer once you have watched fry respond to a well-timed, well-rinsed nauplii feeding firsthand.
— Demeter
Demeterbioscience brine shrimp products for your feeding station
Running a consistent brine shrimp feeding station depends on the quality of the shrimp you start with. Demeterbioscience raises live brine shrimp in land-based, controlled systems fed exclusively on the microalgae Dunaliella, producing shrimp with at least 40% protein content and none of the seasonal variability that affects wild-harvested sources.

Whether you need a one-time order or a steady monthly supply, Demeterbioscience offers live brine shrimp direct to your door, along with bulk orders for fish stores, museums, and serious hobbyists. A monthly membership keeps your station stocked without reordering every week. Visit Demeterbioscience to see current options and find the right supply plan for your setup.
FAQ
What salinity and temperature do brine shrimp eggs need to hatch?
Brine shrimp eggs hatch best at 20–25 ppt salinity and 26–28°C. These conditions produce hatch rates of 80–90% within 18–24 hours.
How do I harvest brine shrimp without getting shells in my tank?
Turn off aeration, let the vessel settle for 5–10 minutes, then siphon nauplii from the middle layer. Rinse through a 100–150 micron mesh net for 10–15 seconds before feeding.
How much brine shrimp should I feed my fish at one time?
Feed only the amount your fish can consume in 3–5 minutes. Uneaten nauplii die and decompose, raising ammonia levels in the tank.
What is gut-loading and does it matter for aquarium fish?
Gut-loading means transferring newly hatched nauplii into nutrient-enriched water for 12–24 hours before feeding. It significantly raises the nutritional value of the shrimp, especially for marine larvae and breeding fish.
Why is my brine shrimp hatch rate low even with the right setup?
The most common causes are temperature below 24°C, salinity outside the 20–25 ppt range, or egg density that is too high. Reduce eggs to 0.5–1 teaspoon per liter and verify your thermometer is accurate.