
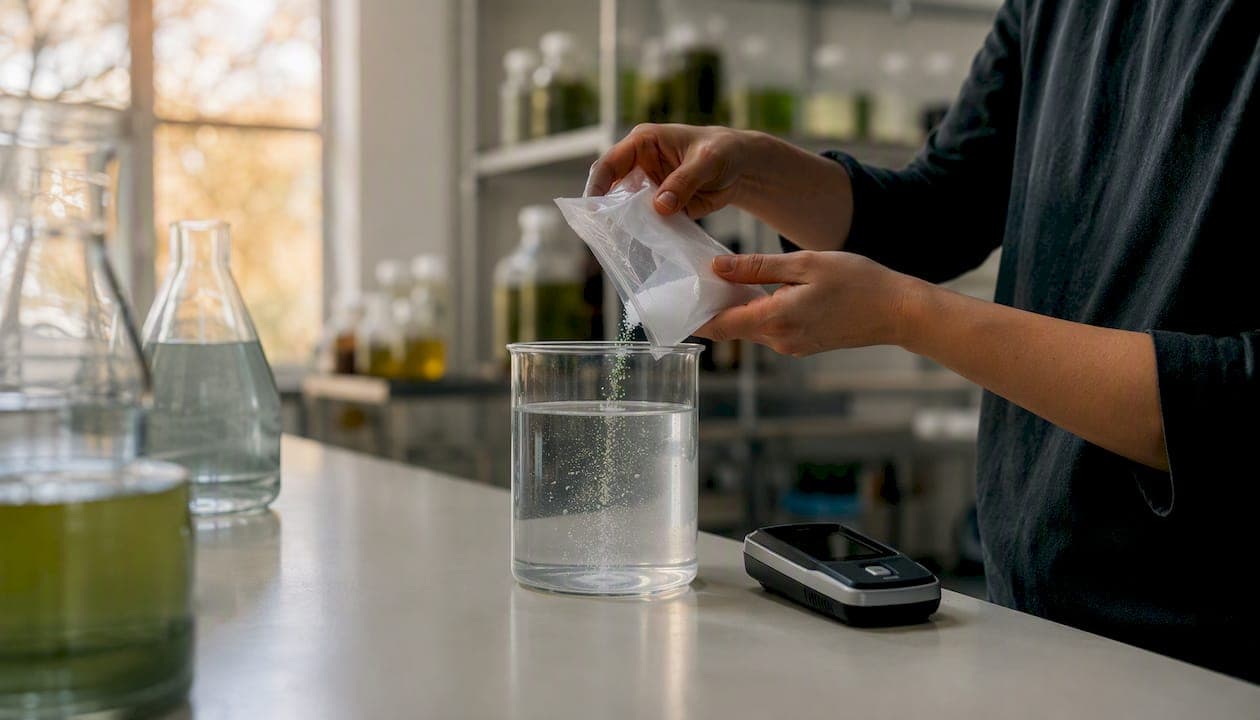
For hatching, target 25–28°C (77–82°F), salinity a commonly recommended salinity range near 25–30 ppt (specific gravity 1.018–1.022), pH 8.0–8.5, and dissolved oxygen above 2 mg/L. For rearing adults long-term, push salinity to 30–40 ppt and hold the same temperature and pH window. Get these brine shrimp water parameters right and you can expect nauplii in roughly 24 hours. Miss any one of them and hatch rates collapse, often without an obvious reason.
The table below gives you the quick-reference conversions you need before mixing a single liter of water.
To mix a 25 ppt solution: dissolve 25 g of marine salt into 1 liter of dechlorinated or reverse-osmosis water, aerate for 15 minutes, and confirm with a refractometer before adding cysts. That single measurement step prevents the most common hatch failures.
Key Takeaways
Reliable brine shrimp hatching requires a salinity in the commonly recommended range near 25–30 ppt, temperature of 25–28°C, pH of 8.0–8.5, and adequate dissolved oxygen typically above a moderate threshold for good hatching — all measured and confirmed before cysts enter the water.
| Point | Details |
|---|---|
| Hatch salinity target | commonly recommended salinity range near 25–30 ppt (SG 1.018–1.022); below 20 ppt or above 35 ppt reduces hatch rates. |
| Temperature window | 25–28°C (77–82°F) produces hatches in approximately 24 hours; below 22°C extends to 36–48 hours. |
| pH and DO minimums | Hold pH at 8.0–8.5 and adequate dissolved oxygen typically above a moderate threshold for good hatching throughout the hatch period. |
| Freshwater is lethal | Nauplii die within approximately one hour in freshwater; always rinse and hold in saltwater at 10 ppt or above. |
| Demeterbioscience option | Farmed live brine shrimp fed on Dunaliella deliver at least 40% protein and consistent live counts without hatch setup. |
Table of Contents
- Why do salinity, temperature, pH, and dissolved oxygen control brine shrimp success?
- What salinity levels give the best brine shrimp hatch rates?
- What temperature produces the fastest brine shrimp hatch?
- What pH and alkalinity do brine shrimp need to hatch reliably?
- How much dissolved oxygen do brine shrimp need, and how do you maintain it?
- What lighting do brine shrimp need for hatching and culture?
- How do you prepare hatch and rearing water correctly?
- How do you set up a practical brine shrimp hatchery?
- When should you decapsulate cysts, and how do you enrich nauplii?
- How long does it take brine shrimp to hatch, and how long do nauplii survive?
- How do you diagnose and fix low brine shrimp hatch rates?
- How do farmed, microalgae-fed brine shrimp differ from hatching your own?
- Demeter's five-step routine for reliable hatches
- Skip the hatch setup: Demeterbioscience's farmed live brine shrimp
- Sources
Why do salinity, temperature, pH, and dissolved oxygen control brine shrimp success?
Each parameter controls a different biological lever. Salinity determines whether cysts hydrate and whether nauplii can osmoregulate without burning through their yolk reserves. Temperature sets the pace of embryonic development — too cold and the metabolic clock slows, too hot and enzymes denature. pH affects both the ammonia chemistry in your water and the structural integrity of the cyst shell during hatching. Dissolved oxygen keeps nauplii from suffocating in a dense, poorly aerated vessel.
- Salinity: Cysts need water to cross the chorion membrane and trigger diapause termination. At very high salinities, that hydration step stalls. At the right range, nauplii hatch with enough energy reserves to survive transfer.
- Temperature: Development rate scales directly with temperature within the safe window. A 2°C drop from 28°C to 26°C can add several hours to hatch time; dropping to 20°C can push hatching past 48 hours.
- pH: Below 7.5, hatch rates fall noticeably. The chemistry reason is practical: lower pH shifts ammonia equilibrium toward the toxic un-ionized form (NH₃), which is lethal to nauplii even at low concentrations.
- Dissolved oxygen: Nauplii are aerobic. Below 2 mg/L, they cluster at the surface and die within hours in a dense batch. Aeration also keeps cysts suspended so they hatch evenly rather than clumping at the bottom.
Pro Tip: The hidden failure most hobbyists overlook is metal toxicity from tap water run through copper plumbing. Even trace copper at levels safe for humans can kill nauplii. Always use dechlorinated water or RO water, and never use metal containers or copper airline fittings in your hatch setup.
What salinity levels give the best brine shrimp hatch rates?
Hatching versus rearing: why the ranges differ
Brine shrimp adults are famously tolerant of salinity, surviving anywhere from roughly 1 ppt to over 100 ppt in literature reports. Nauplii are far less forgiving. Lower salinities in the 10–20 ppt range give better initial hatching and early survival because cyst hydration and nauplius osmoregulation both work more efficiently at reduced ionic concentrations. High salinity physically resists water uptake through the cyst membrane, which is why eggs left in water above 85 ppt often fail to hydrate at all.
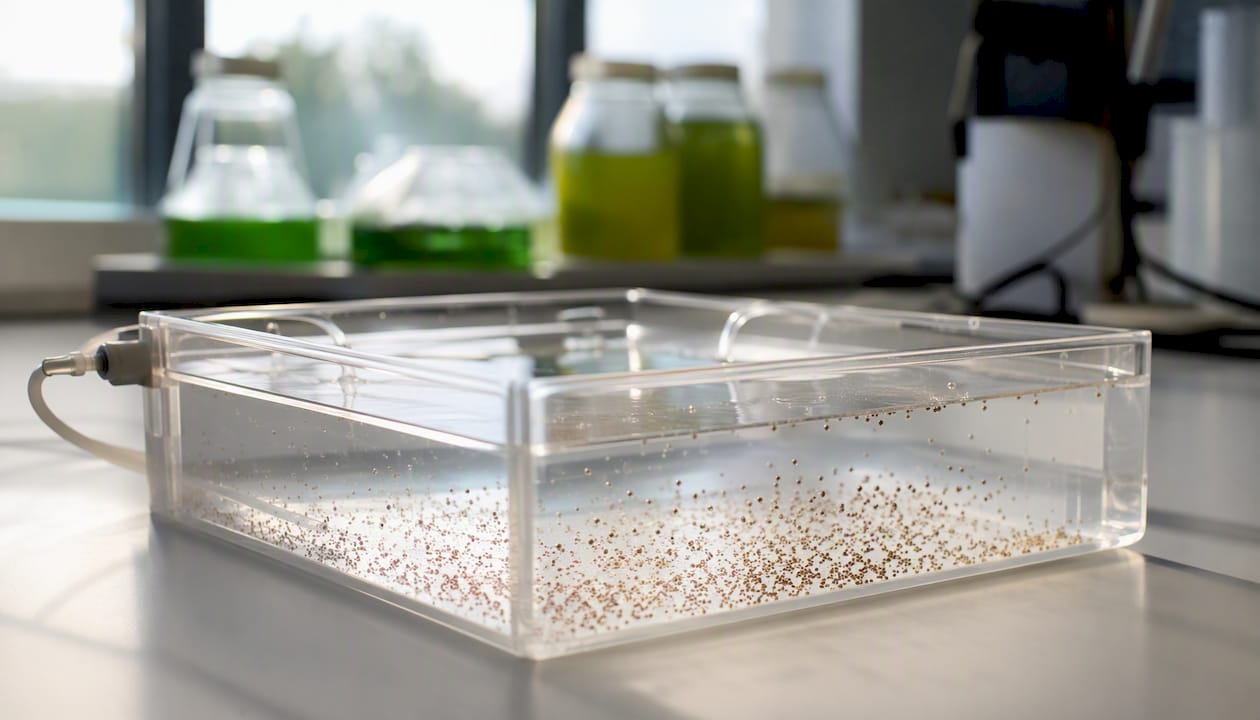
For practical hatching, the commonly recommended sweet spot is a salinity range near 25–30 ppt (specific gravity 1.018–1.022). Hatch rates generally drop below salinities of about 20 ppt, and hatching tends to slow above roughly 35 ppt. For rearing juveniles and adults, 30–40 ppt is the standard working range.
How to measure salinity accurately
A refractometer is the right tool for this job. A floating hydrometer works in a pinch but reads inaccurately at temperatures above or below its calibration point, and the meniscus is easy to misread. A temperature-compensating refractometer calibrated with distilled water costs around $20–$30 and removes most of the guesswork.
Mixing a target salinity step by step
- Start with dechlorinated tap water or RO water at room temperature.
- Weigh your marine salt on a gram scale. For 25 ppt, use 25 g per liter of final volume.
- Add the salt to the water gradually while stirring.
- Aerate the solution for 10–15 minutes until fully dissolved and clear.
- Let it stabilize for at least 30 minutes, then measure with a refractometer.
- Adjust by adding small amounts of salt (to raise) or dechlorinated water (to lower) until you hit your target.
A marine salt mix rather than plain non-iodized salt gives you trace minerals and carbonate buffering that stabilizes pH. Iodized table salt and salts with anti-caking agents are fine for a single emergency hatch but will cause problems in sustained cultures.
Equipment you need:
- Temperature-compensating refractometer (preferred) or floating hydrometer (acceptable for single batches)
- Gram-accurate kitchen or lab scale
- Non-metallic mixing container (food-grade plastic or glass)
- Dechlorinated tap water or RO/DI water
What temperature produces the fastest brine shrimp hatch?
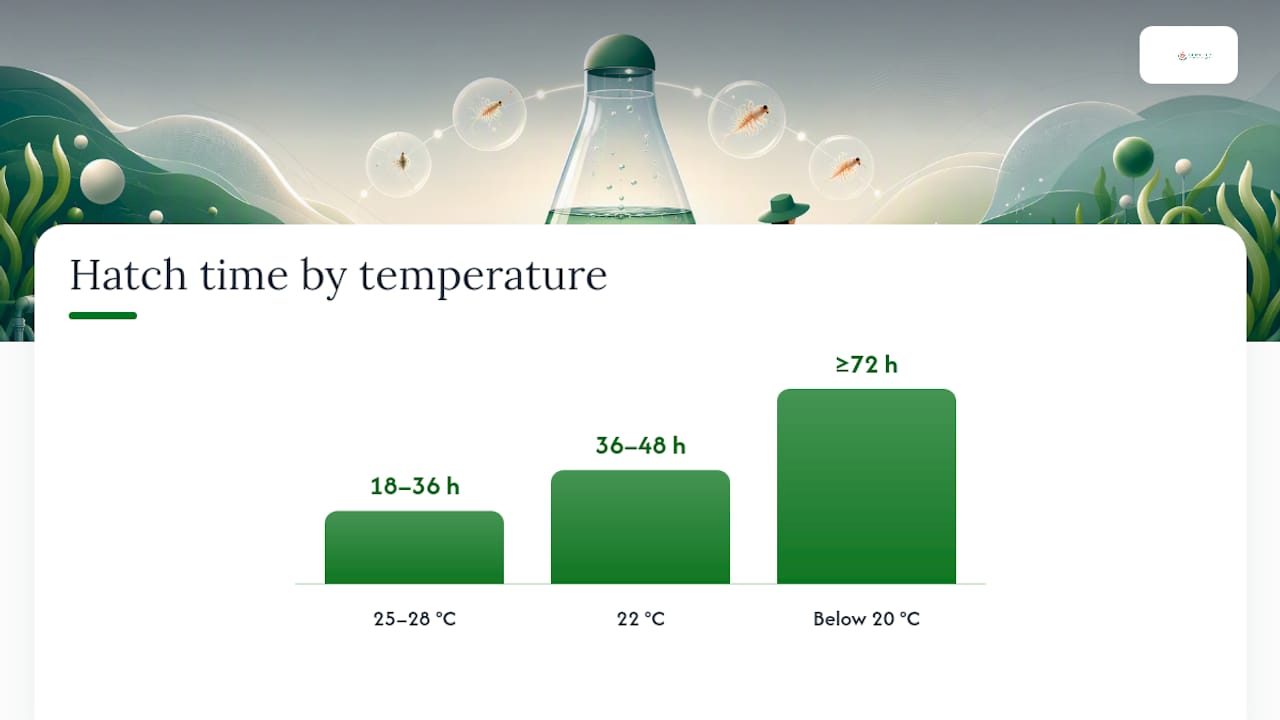
The answer is direct: 25–28°C (77–82°F) produces hatches in approximately 24 hours under good aeration and lighting. At 26–28°C most cysts hatch within 24 hours; at cooler temperatures hatch time extends to 36–48 hours or longer. Above 30°C, hatch rates drop and nauplii mortality rises sharply.
Temperature-to-hatch-time reference:
- 20°C (68°F): 48–72 hours, reduced hatch percentage
- 22°C (72°F): 36–48 hours
- 25°C (77°F): 24–36 hours, good hatch rates
- 28°C (82°F): 18–24 hours, peak hatch efficiency
- 30°C (86°F): Hatch accelerates but nauplii stress increases
- Above 32°C (90°F): Nauplii die; avoid entirely
Consistency matters as much as the target. A tank that swings between 22°C and 28°C overnight produces uneven hatches and weak nauplii. A small aquarium heater with a built-in thermostat, placed near the bottom of the hatch vessel, holds temperature steadily without hot spots. Check with a separate digital thermometer rather than trusting the heater's dial.
What pH and alkalinity do brine shrimp need to hatch reliably?
Target pH 8.0–8.5 for hatching. This range is where hatch rates are consistently highest across published protocols. Optimal hatching outcomes are reported at pH 8.0–9.0, with the lower end of that window being the practical working target for most hobbyists. For rearing, 7.5–8.5 is acceptable, though staying above 8.0 keeps ammonia chemistry safer as the culture matures.
Why alkalinity matters: pH alone does not tell you how stable your water is. Alkalinity (carbonate hardness, or KH) is the buffer that resists pH crashes. In a dense culture, biological activity and CO₂ production drive pH down. Without adequate buffering, pH can drop below 7.5 overnight, which is enough to suppress hatching and stress nauplii.
- Marine salt mixes typically provide enough carbonate alkalinity to buffer a hatch vessel for 24–48 hours without additional adjustment.
- If you are using plain non-iodized salt and notice pH dropping, a small addition of sodium bicarbonate (baking soda) raises alkalinity. Add no more than 0.5 g per liter at a time and retest.
- Test pH with a calibrated digital pH meter or a quality liquid test kit. Strip tests are not accurate enough for this application.
Pro Tip: If your hatch water is made from RO water and plain salt, it has almost no buffering capacity. Switch to a marine salt mix or add a small amount of sodium bicarbonate before adding cysts. A pH crash at hour 12 of a 24-hour hatch is one of the most common causes of zero nauplii at harvest.
How much dissolved oxygen do brine shrimp need, and how do you maintain it?
Keep dissolved oxygen above 2 mg/L during hatching. IFAS extension research confirms that DO above 2 mg/L is a minimum threshold for consistent, high hatch rates, and denser cultures need proportionally more aeration to stay above that floor. In practice, vigorous bubbling that keeps cysts visibly suspended throughout the water column is your best field indicator that DO is adequate.
Aeration equipment for hobbyists and small hatcheries:
- A standard single-outlet aquarium air pump (rated for 10–20 gallons) handles a 1–2 liter hatch vessel comfortably.
- For 5–10 liter vessels, use a dual-outlet pump or a gang valve manifold feeding two airstones.
- Fine-bubble airstones distribute oxygen more efficiently than coarse-bubble ones and keep cysts better suspended.
- Airline tubing should be food-grade silicone or standard aquarium PVC. Avoid metal fittings near the hatch water.
DO test options: A liquid dissolved oxygen test kit (API, Salifert) gives reliable readings for hobbyist use. Optical DO meters are more accurate and reusable but cost significantly more.
Signs of low DO and what to do:
- Nauplii clustering at the water surface or at the air-water interface
- Sluggish, slow-moving nauplii that do not respond to a light source
- Foul or sulfurous odor from the vessel
Pro Tip: Never seal a hatch vessel with an airtight lid. CO₂ builds up, pH drops, and DO falls simultaneously. A loose cover to reduce evaporation is fine; an airtight seal is not.
What lighting do brine shrimp need for hatching and culture?
Light serves two functions in a hatch setup: it triggers the photoreceptors that help initiate hatching, and it concentrates nauplii near the light source for easy harvest. For hatching, aim for 1,500–3,000 lux of strong directional light. IFAS extension protocols specify approximately 2,000 lux as the target illumination for consistent hatch rates.
Practical lighting guidelines:
- A 60W equivalent LED bulb placed 6–12 inches from the hatch vessel delivers roughly 1,500–2,500 lux at the vessel wall, which is adequate.
- Photoperiod for rearing cultures: 12–16 hours of light per day keeps adults active and feeding without stressing the culture.
- At harvest, shine a flashlight or focused LED at the bottom of the vessel after turning off the main light. Nauplii swim toward the light and concentrate, making siphoning easy.
- Avoid leaving lights on continuously for rearing cultures. Constant illumination stresses adults and can accelerate algae growth that competes with your feed.
Pro Tip: Incandescent bulbs and high-output grow lights generate enough heat to raise water temperature by 2–4°C in a small vessel. Measure water temperature with the light on, not before you turn it on. An LED equivalent runs cooler and is the better choice for temperature-sensitive hatches.
How do you prepare hatch and rearing water correctly?
Reproducible water preparation is what separates consistent hatch rates from frustrating variability. The procedure below works for both hatch and rearing water; the only variable is your target salinity.
Step-by-step water preparation
- Start with the right water source. Use dechlorinated tap water (treat with sodium thiosulfate or let sit 24 hours) or RO/DI water. Never use untreated tap water; chlorine and chloramine kill nauplii.
- Weigh your salt. Use a marine salt mix. Measure by weight, not volume. For 25 ppt, weigh 25 g per liter of final volume.
- Dissolve the salt. Add salt to water while stirring. Do not add water to a pile of dry salt in a small container.
- Aerate for 15–30 minutes. This drives off CO₂, raises pH, and fully dissolves any remaining crystals.
- Measure and adjust. Check salinity with a refractometer. Adjust with small additions of salt or fresh water.
- Let it stabilize. Ideally, prepare water 12–24 hours in advance and let it sit aerated before adding cysts. This allows pH and temperature to stabilize.
Salt-to-salinity conversion reference
A recipe of approximately 25 g marine salt per liter is the most widely used starting point for hobbyist hatches and gives reliable results across most commercial cyst strains.
Equipment checklist:
- Gram-accurate scale (0.1 g resolution preferred)
- Non-metallic mixing container (at least 20% larger than your target volume)
- Stirring rod or spoon (plastic or stainless steel)
- Temperature-compensating refractometer
- Air pump and airstone for aeration during mixing
- Sodium thiosulfate dechlorinator or RO/DI water source
Never use iodized table salt for sustained cultures. The iodine suppresses microbial activity that brine shrimp depend on, and the anti-caking agents can cloud water and interfere with osmoregulation.
How do you set up a practical brine shrimp hatchery?
Minimal hatch protocol
- Choose your vessel. A 1–2 liter clear plastic or glass bottle works for small batches. Cone-bottom vessels (inverted bottles, commercial hatch cones) make harvesting easier because nauplii and empty shells separate by density.
- Fill to 80% capacity with prepared saltwater at your target salinity (a commonly recommended salinity range near 25–30 ppt for standard hatches).
- Load cysts. A standard loading rate is 1–2 g of cysts per liter of water. Higher densities reduce hatch percentage and oxygen availability.
- Set aeration. Position the airstone at the bottom center of the vessel. Bubbling should be vigorous enough to keep all cysts in motion.
- Position lighting. Place a lamp 6–12 inches from the vessel. Keep it on continuously for the first 24 hours of hatching.
- Hold temperature. Use a submersible heater or place the vessel in a warm water bath. Target 25–28°C.
- Harvest at 24–36 hours. Turn off the air, let the vessel settle for 5–10 minutes. Empty shells float, unhatched cysts sink, and nauplii concentrate in the middle. Siphon the nauplii layer through a 125–150 micron mesh screen, rinse with clean saltwater, and feed immediately.
Tools and mesh sizes:
- 125–150 micron brine shrimp net for harvesting nauplii
- 300–500 micron mesh to separate larger juveniles
- Siphon tubing (3–4 mm inner diameter) for controlled extraction
Pro Tip: Hatch water can be reused once if it smells clean and shows no bacterial bloom (cloudiness or foam). After two uses, discard it. Reusing water that has started to turn is the fastest way to introduce bacterial contamination that suppresses your next hatch. Top off evaporation losses with fresh dechlorinated water, not saltwater, to avoid salinity creep.
When should you decapsulate cysts, and how do you enrich nauplii?
Decapsulation removes the outer chorion shell from brine shrimp cysts using a dilute bleach solution. The result is a cyst that hatches faster, produces nauplii with higher digestibility (no shell fragments for fish larvae to ingest), and shows higher hatch rates in some strains. IFAS extension data confirms that decapsulation raises both hatch rates and digestibility.
When decapsulation is worth the effort:
- You are feeding very small larvae (clownfish, gobies, seahorses) that struggle to digest the chorion
- Your cyst strain has a thick shell and shows low hatch rates at standard conditions
- You need a faster hatch (decapsulated cysts often hatch 2–4 hours earlier)
Basic decapsulation safety:
- Work outdoors or in a well-ventilated space. Bleach fumes are irritating.
- Use a 0.5% sodium hypochlorite solution (diluted household bleach). Never use concentrated bleach directly.
- Neutralize with sodium thiosulfate solution immediately after the orange color appears (typically 2–4 minutes).
- Rinse thoroughly with clean saltwater before hatching.
Enrichment for nutritional value
Newly hatched nauplii (Instar I) carry their yolk sac and are nutritionally complete. By Instar II (roughly 6–12 hours post-hatch), the yolk is partially consumed and enrichment becomes beneficial. For larvae that need high lipid content, a short enrichment period of 6–12 hours in a dedicated enrichment vessel improves the nutritional profile delivered to fish.
Common enrichment feeds and schedule:
- Concentrated microalgae paste (Nannochloropsis, Isochrysis): add to enrichment vessel at manufacturer's recommended dose
- Commercial enrichment products (SELCO, Algamac): follow label dosing for 6–12 hour enrichment windows
- Feed enriched nauplii within 2 hours of the enrichment period ending; do not let them starve post-enrichment
Pro Tip: For a brine shrimp feeding schedule that integrates enrichment timing with your hatch cycle, plan your hatch to finish 6–8 hours before your fish feeding window. That gives you a clean enrichment window without rushing.
How long does it take brine shrimp to hatch, and how long do nauplii survive?
At 25–28°C and commonly recommended salinity range near 25–30 ppt, expect the first nauplii to appear within 18–24 hours, with peak hatch at 24–36 hours. At 22°C, that window stretches to 36–48 hours. Below 20°C, hatching becomes unreliable and may take 72 hours or more with reduced yield.
Growth timeline after hatch:
- Instar I (0–6 hours post-hatch): Nauplii carry full yolk sac. Highest nutritional value. Do not need to be fed.
- Instar II (6–12 hours): Yolk partially consumed. Mouth opens; can begin feeding. Best window for enrichment.
- Juvenile (days 2–5): Actively feeding. Require microalgae or appropriate feed in culture.
- Sub-adult to adult (days 7–21): Sexually mature adults at 2–3 weeks under good conditions.
Survival limits every aquarist needs to know:
Nauplii placed in freshwater die within approximately one hour. This is not a slow decline; it is rapid osmotic collapse. Never rinse harvested nauplii in tap water or freshwater. Always use saltwater at or near your hatch salinity for rinsing and holding.
Minimum salinity to avoid severe stress: approximately 10 ppt. Below that, nauplii show immediate osmotic stress and die within minutes to hours depending on the exact concentration.
Common questions:
Will brine shrimp hatch at 70°F (21°C)? Yes, but expect 36–48 hours and a lower hatch percentage than at 77–82°F. Warming the water to 25°C is worth the effort.
How long can nauplii be held before feeding? At hatch salinity and temperature, nauplii remain viable for 12–24 hours post-hatch. Refrigerating at 4°C in saltwater extends this to 48 hours, though nutritional quality declines.
Can adults survive in a freshwater aquarium? No. Even brief exposure to freshwater is lethal. Always maintain at least 10 ppt for any live brine shrimp.
How do you diagnose and fix low brine shrimp hatch rates?
Work through this checklist in order before discarding a batch. Most failures have a single fixable cause.
Diagnostic checklist:
- Salinity out of range: Measure with a refractometer. If above 35 ppt or below 15 ppt, the hatch will be poor. Adjust and restart.
- Temperature too low: Check with a separate thermometer. If below 24°C, add a heater and wait. Do not discard the batch yet.
- pH below 7.5: Test with a calibrated meter. Add 0.5 g sodium bicarbonate per liter, aerate, retest.
- Insufficient aeration: Cysts sitting on the bottom rather than circulating means your air pump is undersized or the airstone is clogged. Replace the airstone and increase pump output.
- Old or poor-quality cysts: Cysts stored improperly (warm, humid, or unsealed) lose viability fast. A simple test: place a small sample in fresh saltwater at 28°C with good aeration. If fewer than 50% hatch in 24 hours, the cysts are the problem.
- Metal toxicity: If you are using tap water through copper pipes, switch to RO water or a dedicated dechlorinated source. Metal contamination produces near-zero hatch rates with no other obvious cause.
- Bacterial contamination: Cloudy water with a foul smell means bacterial bloom. Discard the batch, sterilize the vessel with a dilute bleach solution, rinse thoroughly, and start fresh.
Action plan for a failed batch:
- Remove and discard all water and cysts.
- Soak the vessel in a 1:10 bleach-to-water solution for 30 minutes, then rinse five times with clean water.
- Prepare fresh saltwater from a new source (RO or freshly dechlorinated) using a marine salt mix.
- Verify temperature, salinity, and pH before adding new cysts.
- Use a fresh portion of cysts from a sealed, refrigerated container.
Common causes of poor hatch rates include old cysts, incorrect salinity, low temperature, pH below 7.5, insufficient aeration, and metal toxicity from tap water plumbing. Addressing them in that order covers the vast majority of failures.
How do farmed, microalgae-fed brine shrimp differ from hatching your own?
When you hatch cysts at home, you control the water parameters but not what the shrimp ate before they were packaged as cysts. Wild-harvested cysts come from brine shrimp that fed on whatever was available in their natural lake environment, which varies by season and location. The result is nutritional inconsistency: protein content, lipid profiles, and gut-load status fluctuate batch to batch.
Demeterbioscience's farmed live brine shrimp are produced in land-based systems where salinity, temperature, and feeding are controlled throughout the shrimp's entire life cycle. For aquarists feeding sensitive larvae or breeders running commercial hatcheries, that consistency changes outcomes in ways that parameter control alone cannot fix.
What controlled production means for parameter expectations:
- Farmed live shrimp arrive already acclimated to a defined salinity range. Sudden transfer to very different tank salinities stresses them; ask your supplier for the shipping salinity and match it within 5 ppt.
- Because they are gut-loaded with Dunaliella, they do not need enrichment before feeding. They are nutritionally ready at delivery.
- Live counts are predictable. You are not guessing at hatch percentage from a cyst tin.
Buyer questions to ask any live brine shrimp supplier:
- What salinity are the shrimp shipped in?
- What microalgae or feed are they raised on, and what is the guaranteed protein content?
- What is the guaranteed live count per shipment?
- How are they packaged for transit, and what is the maximum transit time?
- Do you offer subscription or bulk pricing for recurring orders?
For a side-by-side look at the tradeoffs between live and frozen options, the live vs. frozen brine shrimp comparison covers what actually changes in nutritional value and feeding response.
Demeter's five-step routine for reliable hatches
Consistency is the whole game. Here is the five-step routine Demeterbioscience uses as the baseline for reliable production:
- Set targets before touching water. Write down your salinity, temperature, and pH targets for the batch. Do not rely on memory when you are also managing aeration, lighting, and timing.
- Prepare water 12–24 hours in advance. Mix, aerate, and let the water stabilize overnight. Measure salinity, temperature, and pH the morning of the hatch. Adjust if needed before cysts go in.
- Standardize your cyst dose. Weigh cysts on a gram scale every time. Variable cyst loading is one of the most common sources of inconsistent yields.
- Run aeration and lighting on a timer. Continuous aeration for the full hatch period; lighting on for the first 24 hours. Timers remove human error from the equation.
- Harvest on schedule, not by eye. Set a timer for 24 hours. Harvest at that point regardless of whether the vessel looks "done." Early harvesting captures Instar I nauplii at peak nutritional value.
Pro Tip: The single most reliable improvement to any hatch routine is preparing water the day before. Fresh-mixed saltwater has unstable pH and dissolved gas levels. Water that has sat aerated overnight is chemically stable and produces more consistent results.
Skip the hatch setup: Demeterbioscience's farmed live brine shrimp
Culturing your own brine shrimp gives you control, but it also means managing water chemistry, equipment, and timing every single day. For aquarists and breeders who want consistent live feed without the hatchery overhead, Demeterbioscience offers a direct alternative.
Farmed on land and fed exclusively on Dunaliella microalgae, Demeterbioscience's live brine shrimp arrive gut-loaded, nutritionally consistent, and ready to feed. No hatch failures. No salinity miscalculations. No waiting 24 hours to find out your cysts were old.
Order live brine shrimp for direct-to-consumer delivery, or explore bulk ordering options for fish stores, research institutions, and aquaculture operations that need volume supply on a predictable schedule. Subscription plans are available for recurring shipments. Contact Demeterbioscience to discuss custom quantities or institutional pricing.
Sources
The sources below were used to assemble the numeric targets, protocols, and troubleshooting guidance in this article. Each one is worth bookmarking for deeper reference.
- HATCHING and GROWING BRINE SHRIMP (Artemia)
- Brine shrimp aquaculture (IFAS extension summary)
- How to hatch brine shrimp at home (Reefphyto)
- Brine shrimp aquaculture - Your ultimate guide to cultivating live
- How to keep brine shrimp (Tankarium)
- How to raise brine shrimp: The complete step-by-step guide